Applying wall stickers is a great way to add personality and character to your child's bedroom or playroom. Wall stickers are also a fun and easy way to decorate for a party or special occasion. But before you can enjoy your new wall stickers, you have to apply them. In this comprehensive guide, we will show you how to apply wall stickers like a pro. We will touch upon different types of wall stickers, made from different materials, for different purposes and how you should go about applying these. We'll cover everything from choosing the right stickers for your space to measuring and cutting them correctly to applying them without leaving any bubbles behind. If you have a specific question, just jump to the relevant chapter using the links below. Let's get started!
What are Wall Stickers?
The Do's and Don'ts when Applying Wall Stickers
How to Apply Wall Stickers: Step-by-Step
Tips on Decorating with Wall Stickers
Troubleshooting
Alternatives to Wall Stickers
My Nametags recommendations
How to Apply Wall Stickers
What Exactly are Wall Stickers?
Wall stickers, also known as wall decals, are adhesive vinyl stickers applied to walls, doors, windows, and other surfaces. They have become increasingly popular in recent years, as they are a quick and easy way to add personality and character to any space. Some wall stickers are designed to look like peel-and-stick wallpaper, while others feature intricate designs or playful characters. Wall stickers come in all shapes and sizes, and there are endless designs and styles to choose from. In essence, they can be categorized into two types: by purpose or by material.
Purpose-Based Wall Stickers
There are a variety of purpose-based wall stickers available on the market, including:
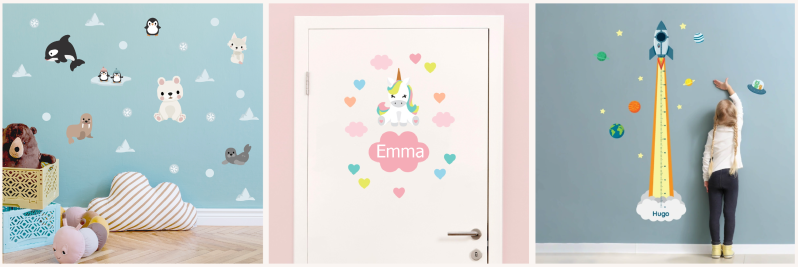
Wall Stickers: As the name suggests, these are stickers made for walls. Wall stickers can be large enough to cover an entire wall or small enough to be used as a border. They come in a variety of shapes and designs, including animals, characters, flowers, and landscapes. They can be used to decorate children's bedrooms, playrooms, or any other room in the house.
Wall stickers are more than just a way to decorate your child's room; they can also be used as learning tools. Wall stickers are available that feature educational content, such as math problems, spelling words, and even the solar system.
Door Stickers: Door stickers are made to be applied to doors, whether they're on the exterior or interior of a house. Exterior door stickers, like front door number stickers, usually have a weatherproof coating to protect them from the elements. In contrast, interior door stickers are designed to be removable so that they can be changed out as often as you like.
Like wall stickers, Door stickers come in various shapes and sizes and can be used to decorate any door in your home. They are perfect for adding a pop of colour or a fun design to your child's bedroom, bathroom, or playroom. They can even be put on a cupboard, wardrobe or a kitchen fridge, if they are high enough quality.
Height Charts: Height charts are wall stickers that measure a child's height as they grow. They can be applied to any flat surface, such as the inside of a closet door, and are usually marked in both inches and centimetres. Height charts are a great way to keep track of your child's growth, but they can also be used for decorative purposes. There are now height charts that feature fun designs and characters, making them perfect for children's bedrooms or playrooms.
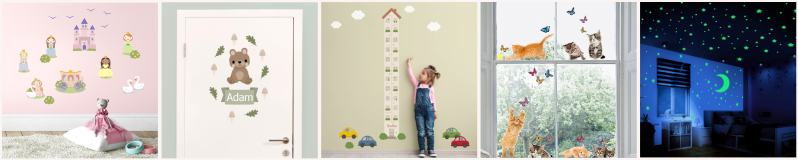
Window Decals: Window decals are designed to be applied to the inside of windows. They come in a variety of designs, including characters, landscapes, and abstract patterns. They're great for adding some personality to a room or for dressing up a window for a special occasion. Window decals are made from a translucent material that allows natural light to pass through, so they're perfect for rooms with limited sunlight. They can also be used on privacy glass windows.
Ceiling Stickers: Ceiling stickers are designed to be applied to ceilings to create a unique and fun look. These self-adhesive stickers are often made with glow-in-the-dark material so that they can be visible even in the dark. They come in a variety of shapes and designs, including stars, planets, and rainbows. They're great for adding a little something extra to your child's bedroom or playroom. What's more, they're perfect for themed bedrooms and parties.
Material-Based Wall Stickers

The material difference comes down to whether you are looking for a temporary or permanent solution. This is determined by the type of adhesive used on the back of the sticker:
Repositionable: Repositionable wall stickers are made with a temporary adhesive that allows them to be removed and reapplied multiple times without losing their stickiness. They're an excellent option for renters who want to decorate their walls without causing any damage. If you make a mistake while applying them, you can just peel the stickers off and try again. To store repositionable stickers in between uses, keep them in their original packaging or place them between two pieces of baking or greaseproof paper. This will help prevent them from sticking to each other and making a mess.
Removable: Removable wall stickers also have a temporary adhesive, but they're not as sticky as repositionable stickers. They can be removed without leaving any residue behind, but the sticker will be destroyed in the process. They're an ok and possibly cheaper option if you want to decorate your walls without damaging them and worry about possibly having to remove them after a while.
Permanent: Permanent wall stickers have a permanent adhesive that will stick to the wall until you remove it. These are almost never recommended for private homes. They're not recommended for renters or people who want to be able to change their minds about their decor later on, as they can be challenging (and sometimes impossible) to remove without damaging the wall. If you do decide to go with a permanent sticker, make sure you're confident in your choice and that the design is something you'll love for years to come. You should probably get professional help with putting up permanent wall stickers, as a badly applied wall sticker can not stay up, yet it might damage the wall when taken down.
How to Choose the Right Wall Stickers for Your Space
The first step in applying wall stickers is choosing the right stickers for your space. When selecting stickers, consider the following:
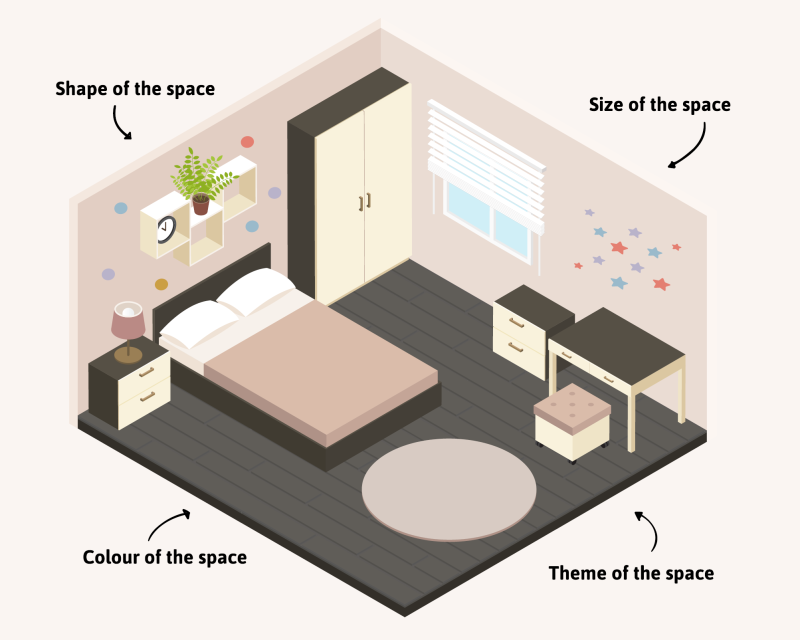
The size of the space: Make sure to choose stickers that are the correct size for the space you want to decorate. Use a ruler to measure the dimensions of the space, and then choose stickers that are at least that size. Consider the space and distance between the stickers when choosing a design for home décor.
The shape of the space: Not all stickers will fit every space, so make sure to choose ones that are appropriate for the shape of the area you want to decorate. For example, if you have a circular mirror in your bathroom, choose a circular sticker to match. If you have an odd-shaped space, consider using a custom-made sticker.
The theme of the space: Choose stickers that match the theme or style of your child's room or playroom. For example, if your child's room is decorated in a jungle theme, choose stickers with animals or trees. If you're not sure what theme to choose, consult with a professional interior designer.
The colour of the space: Choose stickers that will match the colours of your kid’s room or playroom. If you're unsure what colours to choose, consider sticking to neutrals like black, white, and grey or bright primary colours like red, blue, and yellow.
Preparing the Wall Before Applying Stickers
Before applying wall stickers to your child's bedroom or playroom, you must prepare the wall. This involves cleaning the height of the wall and removing any dust or debris. Here are the seven Do's and Don'ts of prepping a wall for stickers:
THE DO'S:

1- Clean the wall's surface: Use a damp cloth or sponge to clean the wall. If you're using a sponge, be sure to wring it out first, so it's not too wet. You don't want water dripping down your child's walls!
2- Remove any dust or debris: Use a vacuum cleaner to remove any dust or debris from the wall.
3- Dry the wall: Allow the wall to dry completely before applying stickers. If your wall is freshly painted, it's best to wait 3-4 weeks before applying stickers. New paint releases volatile organic compounds (VOCs), causing the stickers to peel or bubble.
4- Prepare a level surface: If you're applying stickers to a textured wall, use an iron or blow dryer to smooth out the texture. Applying stickers to a textured surface can result in air bubbles or wrinkles.
5- Check the weather: Do not apply stickers on rainy days or days with high humidity. The adhesive on stickers is less likely to stick in humid conditions.
6- Leave Sticker in Room Temp: Leave your sticker at room temperature for 24 hours before applying it to the wall. This will help it stick better once applied. Room temperature is 15-25 C or 60-80F.
7- Leave Sticker backing on: It might be tempting to remove the sticker backing as soon as you receive it, but don't! Remove it only when you're ready to apply the sticker. Removing the backing paper prematurely can cause the adhesive to lose its stickiness.
THE DON'TS:
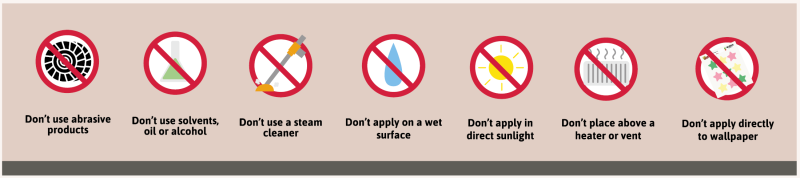
1- Don't use abrasive cleaning products to clean the wall: Abrasive cleaners include scouring pads, steel wool, and bleach. These cleaners can damage the surface of your wall and make it difficult for stickers to stick.
2- Do not use solvents, oil products, or alcohol to clean the wall: These chemicals may damage the stickers and cause them to peel off.
3- Don't use a steam cleaner: Steam cleaners can cause damage to the wall or wallpaper and should not be used.
4- Don't apply stickers to a wet surface: Wait for the wall to dry completely before applying stickers. Applying stickers to a damp surface can cause the stickers to peel or come off the wall.
5- Don't apply stickers in direct sunlight: Sunlight can make the adhesive on stickers less effective and cause the stickers to fade over time.
6- Don't place stickers above a heater or vent: Stickers placed above a heater or vent can become warped and may peel or fall off.
7- Do not apply stickers directly to wallpaper. Wallpaper can be damaged by the adhesive on wall sticker decals. Instead, remove any wallpaper before applying stickers.
8- Don't apply stickers to walls painted with siliconised or emulsion paint. We do not recommend using our wall stickers on walls with siliconised or emulsion paint, as these types of paints create a surface that prevents the stickers from adhering properly, leading to peeling or falling off.
What Tools Might I Need to Apply Wall Stickers?
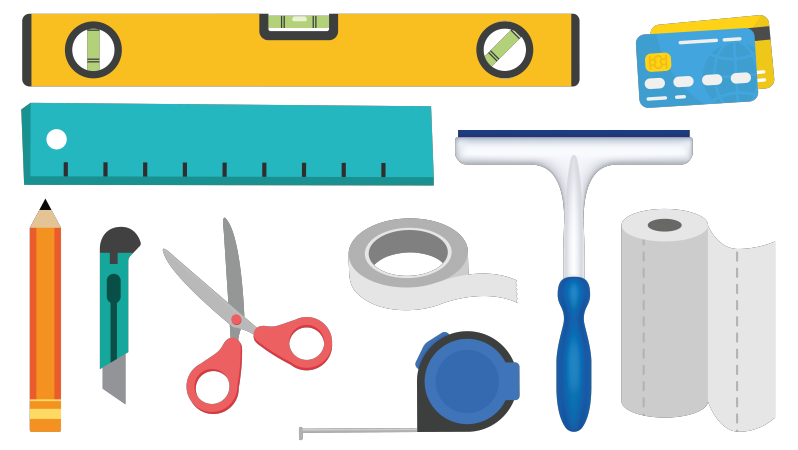
In order to apply wall stickers, you may need all or some of the following tools depending on the type of sticker. Read the instructions and think through how you will do it before getting started, and make sure you have all the tools you might need to hand.
Spirit Level: This tool will help you ensure that your stickers are level.
Ruler: This will help you measure and mark the stickers accurately.
Pencil: This is necessary to make markings on the wall before applying the sticker.
Measuring Tape: This will help you measure and cut your stickers to the correct size.
Credit Card/Squeegee/Driver's License: This can be used to smooth out air bubbles and wrinkles.
Scissors/Other Cutters: These can be used to cut stickers to the desired size.
Masking Tape: This helps ensure that the edges of stickers are straight.
Paper Towel: This will be needed if you use the wet method described below to apply stickers. You will use it to clean the wall and remove any adhesive residue.
Transfer Tape: This is also needed if you use the wet method to apply stickers. It helps to transfer the sticker from the backing paper to the wall.
How to Apply Wall Stickers: Step-by-Step Guide
Now that you're fully equipped with the necessary tools and knowledge let's get started on how to apply wall stickers. There are at least three ways to apply wall stickers:
1) Applying Small Stickers
Applying small stickers such as My Nametags’ beautiful construction wall stickers that every little boy will love is the easiest way to go. Follow these simple steps:
1- Measure and mark the sticker with a pencil where you want to place it on the wall.
2- Use a spirit level to ensure that the sticker is level.
3- Apply pressure to the sticker with your fingers and slowly peel off the backing.
4- Push from one corner of the sticker to another to ensure that there are no air bubbles.
5- Done! Let your little one admire his work of art.
2) Applying Large Wall Decals
Applying large stickers such as a door or wall decals can be a little more challenging. The main reason for this is that there is more surface area for air bubbles to form. But you should not be discouraged because, with a bit of patience and the proper techniques, you can apply the sticker without any problems. The first thing you need to know is that these stickers are made of three layers: the top layer is the vinyl sticker, the middle layer is the adhesive, and the bottom layer is the backing paper. While you might be able to apply it alone, it is much easier to apply with the help of a friend. When you are ready to apply the sticker, follow these steps in order:
1- Clean the surface of the wall with a damp cloth to remove any dust or dirt. Dry the surface with a clean cloth.
2- Set the sticker on top of the surface with the transparent application layer facing up. Use heavy objects like books or weight to keep the sticker in place. Leave it like that for some time to ensure that the sticker adheres to the surface well.
3- While on the surface, use a credit card or any other hard object to smooth out the air bubbles or creases.
4- Use a pencil and ruler to mark the edges of the sticker on the wall. This is necessary to ensure a straight edge when you cut the sticker.
5- Lift the sticker carefully from the surface and use masking tape to attach the corners of the sticker to the wall. Apply masking tape over the sticker from top to bottom to create a vertical anchor, securing the sticker in place.
6- Now, move back and look at the sticker to see if it's in the desired position. If not, make the necessary corrections.
7- Start from the left corner and remove the tape that you just attached. Slowly peel off the sticker sheet from the baking paper. In the corner, reuse the tape to hold down the baking paper to the wall.
8- Continue peeling away from left to right until you reach the anchor. If there is nobody to hold the removed half of the sticker, just fold it on its non-sticky side to the ride and use masking tape to hold it in place.
9- Using a cutter or scissors, remove the baking paper from the anchor and cut it away.
10- Start applying the first half of the sticker at the anchor and slowly smooth it outwards.
11- Remove the anchor and repeat steps for the other half of the sticker. Use a credit card or hard object to smooth out any air bubbles.
12- Voila! Your large wall decal is now securely on the wall, without any bubbles or wrinkles.
3) The Wet Method
The wet method is one of the most popular ways to apply wall stickers. It's used to place both small and large permanent stickers on glass or metal surfaces. The main advantage of using this method is that there is no danger of the sticker coming off or air bubbles forming. It's also a great way to apply stickers on curved surfaces. The downside is that it can be more challenging and time-consuming than other methods. To apply a sticker with the wet method:
1- Use soapy water to clean the surface and then dry it with a paper towel or cloth. Alternatively, you can use rubbing alcohol to clean glass surfaces.
2- Place your vinyl or a flat surface and apply paper transfer tape to it. Using a credit card or hard object, press the transfer tape onto the vinyl to ensure that the adhesive is well attached and that there are no air bubbles.
3- Cut the excessive transfer tape around the contours of the sticker. You will need a sharp knife such as a box cutter to do this.
4- Remove the factory sheeting from the sticker and ensure that the adhesive is facing up.
5- Add a drop of dish soap into a bowl of water. It would be ideal to have a water sprayer to help apply the water evenly on the vinyl surface.
6- Gently place the wet sticker on the desired surface, and using your hands on the transfer tape, press out any air bubbles.
7- Use a squeegee or credit card to smooth out the vinyl surface and remove excess water.
8- Gently peel the transfer tape from the sticker, making sure that the vinyl stays in place. If it starts to come off, press it down again and wait for the water to soak in a little more. Then try again to peel it off.
9- Done! Your sticker is now on the surface, without any bubbles or wrinkles.
Tips on Decorating a Child's Room with Wall Stickers
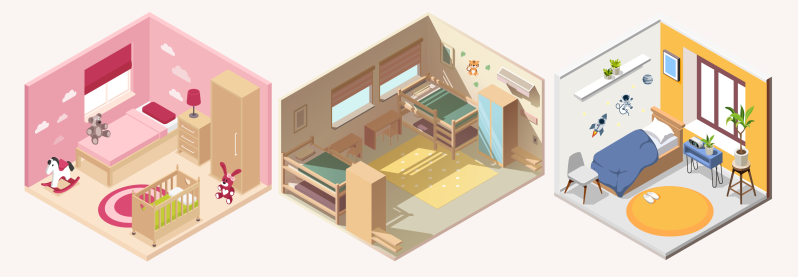
The age of your child will determine the type of wall stickers that you should buy.
1) Babies: Stick to simple and colourful designs that are non-threatening and won't stimulate the baby's senses too much. Avoid stickers with small intricate details or those with a lot of text. Use large and simple stickers to create a focal point on one wall. Scientists recommend contrast and variety in an infant's bedroom to stimulate their growing minds. "Surround a baby with soft pastel colours, and you might as well be blindfolding him," says paediatrician Dr William Sear. Black and white are considered some of the most contrasting colours, so it's a good idea to include them in your child's bedroom.
2) Toddlers: As your child gets older, you can start introducing more complex designs and themes. Toddlers are curious and love to explore their surroundings. They also like things that are pretty and colourful. Stick to playful wall stickers with cartoon characters, animals or flowers. Avoid designs with small details that could be a choking hazard. Try to use bright colours and interesting patterns to create a lively and fun atmosphere in your toddler's bedroom. You can also introduce the alphabet and numbers at this age. Toddlers are eager to learn and will love seeing these concepts represented in a fun way on their walls. They can learn to read their names and start to understand the concept of counting. You can also mix and match wall stickers to create unique designs. My Nametags’ unicorns and fairy stickers, for example, can be combined with other designs to create a dreamy and whimsical atmosphere.
3) School-Aged Children: As your child gets older, their bedroom can become a reflection of their interests and personality. Wall stickers can be a great way to show off their hobbies and passions. If your child loves music, buy some musical notes or instrument wall stickers. If they're into science, get some atoms or planets stickers. There are endless possibilities when it comes to choosing stickers for your child's bedroom. Just be sure to choose designs that are age-appropriate and reflect their interests. Since children at this age can have opinions of their own, it's a good idea to involve them in the process of choosing their bedroom stickers. Let them browse through catalogues or websites and choose the designs they like best. This will help them feel more ownership over their room and increase their interest in keeping it clean and tidy.
Troubleshooting:
1) How to Remove Air Bubbles from Wall Stickers
Air bubbles are a common problem when applying wall stickers. If not removed, they can cause the design to look uneven and sloppy. If you happen to get a few air bubbles after applying your wall sticker, don't worry and just follow these two steps:
I. Use a needle or pin to prick the bubble at one edge. Don't prick the centre of the bubble, or it will just expand and become more difficult to remove.
II. With a credit card or another device, smooth the vinyl down toward the hole in a slow and cautious manner. This should remove the bubble and leave a smooth surface.
2) How to remove Wrinkles or Creases?
This problem is usually caused by the sticker not being stretched out enough before it was applied to the wall. If you do see a wrinkle or crease in your sticker, don't worry! Just follow these two steps:
I. Apply heat to the area using a hairdryer on a low setting. This will help soften the vinyl and make it more pliable. Don't apply too much heat, though, or you could damage the sticker.
II. In a steady and cautious approach, smooth the vinyl down in a straight line toward the crease with a credit card or another device. This should remove the wrinkle/crease and leave a smooth surface.
3) How to Stop Wall Stickers from Peeling?
Wall stickers can start to peel off the wall if they aren't applied properly or if they come into contact with moisture. If you notice that your sticker is starting to peel, don't panic! Just follow these simple steps:
I. Use a hairdryer on low heat to apply heat to the side of the sticker that is peeling. The heat will help the vinyl become more pliable and make it easier to stick back onto the wall. Again, don't apply too much heat, or you could damage the sticker.
II. Gently smooth the vinyl down in a straight line toward the wall with a credit card or another device. This will help the sticker reattach itself to the wall and stop peeling. If this doesn't work, you can use a little bit of wallpaper paste or a spay adhesive to reattach the sticker. Just be sure to apply it in a thin layer so that it doesn't create any bumps or lumps.
4) What if my Wall Sticker Completely Falls Off?
This problem is usually caused by the sticker not being stretched out enough before it was applied to the wall. If you do see a wrinkle or crease in your sticker, don't worry! Just follow these two steps:
I. Apply heat to the area using a hairdryer on a low setting. This will help soften the vinyl and make it more pliable. Don't apply too much heat, though, or you could damage the sticker.
II. In a steady and cautious approach, smooth the vinyl down in a straight line toward the crease with a credit card or another device. This should remove the wrinkle/crease and leave a smooth surface.
This is definitely a situation that you want to avoid! This is usually caused when you don't follow the instructions properly or when you don't wait for the sticker to dry before touching it completely. Applying stickers to a newly painted wall is one of the main reasons for them falling off. New paint releases fumes for a few weeks after being applied, and these fumes can cause the sticker to lose its adhesive. When this happens, you'll usually have to throw the sticker away and purchase a new one. You can try to reapply it, but there's no guarantee that it will stick. If you decide to try to reapply it, use the same steps as above for peeling stickers.
Alternatives to Wall Stickers
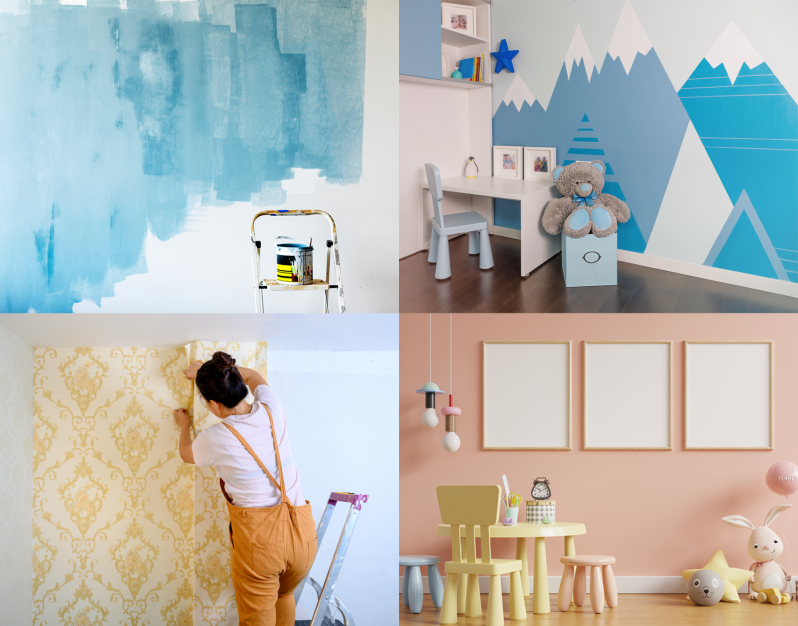
If you're not keen on the idea of putting stickers on your child's walls, there are other ways to decorate their bedroom.
DIY Painting: Some people are good at painting freehand and can create beautiful pieces of art for their child's bedroom. You can also check online for free painting tutorials and ideas. Wall murals, for example, are a great way to add a lot of personality to a child's bedroom. You can find some really cute and fun designs online, or you could even create your own mural with your child's help. But painting a wall mural is a time-consuming task, and it can be a bit daunting for first-time painters. If you're not confident in your painting skills, you could try using stencils instead. Stencils are a great way to add fun and unique designs to your child's bedroom without having to paint them yourself. You can find stencils in all shapes and sizes, and they come in a variety of different materials such as paper, plastic, or metal.
Professional Painting: If you're not confident in your painting skills or you don't have the time to paint a mural, you could always hire a professional painter to do it for you. This is a great option if you want something more elaborate or intricate than what you would be able to achieve on your own. It's also a good option if your child's bedroom has already been painted and you don't want to have to paint over it. The problem with hiring a professional painter, however, is that it can be pretty expensive. You'll usually have to pay by the hour, and most painters will charge anywhere from £30-£100 per hour. So if you're on a tight budget, this might not be the best option for you.
Wallpaper: Wallpapers are another alternative to wall stickers. They come in a variety of different designs, styles, and colours, so you're sure to find something that your child will love. Plus, they're easy to install and remove; all you need is some wallpaper paste or a spay adhesive. What is great about wallpapers is that they can completely transform a room. If your child's bedroom is looking a little bit bland, or you just want to change things up for a new look, wallpaper is the perfect solution. Just be sure to choose a design and pattern that will match the rest of the décor in the room. The biggest downside to wallpapers is that they can be quite expensive. You'll usually have to buy a roll of wallpaper and perhaps hire a professional to install it for you, which can add up to a pretty hefty bill. Installing wallpaper yourself can be a bit tricky, so it might be best to leave it to the professionals.
Hang Posters/Paintings: Another approach to decorate a kid's room without using stickers is to hang posters or paintings on the walls. You can find posters and paintings in various shapes and sizes, and there are plenty of designs to choose from. Plus, they're a lot cheaper than wallpaper or hiring a professional painter. What's great about this approach is that it allows you to change the décor of your child's room as often as you like. If they get bored of one design, simply takedown the poster or painting and replace it with something new. This also gives you the freedom to be creative and design your own posters or paintings. The downside to this approach is that it can be a bit boring if you only hang posters or paintings on the walls. Children might not appreciate having the same thing on their walls all the time. Plus, if you're not artistic, it can be difficult to come up with your own designs.
My Nametags recommendations
What is the best wall décor for children’s bedroom walls?
There are a considerable amount of options when it comes to wall décor. However, if you are looking for a quick, easy and tidy option, we recommend you use wall stickers to personalise your child's room with bright, fun designs that are as creative as your child's imagination.
When purchasing wall stickers you will find many different types so it is important to know what type will work best for your home. The first thing to consider is the surface you will be placing the stickers on. You must ensure that the wall décor you purchase can be applied to your desired surface.
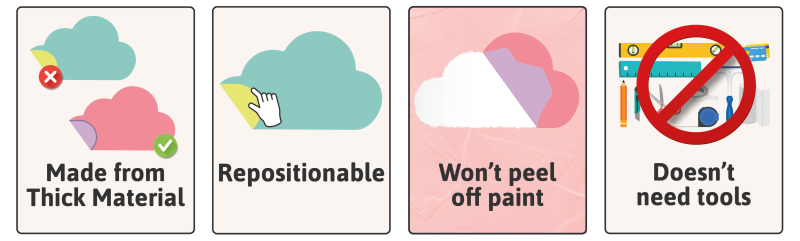
Secondly you will have to think about what material your wall stickers should be. Wall décor can be tricky to apply properly. Depending on what they are made of they can be prone to air bubbles, wrinkles and creases which is why we recommend you opt for wall stickers made from a thicker material as it will make the above mentioned a lot less likely. Applying wall stickers can also require a lot of planning to ensure you apply the sticker in exactly the right place which can make it hard to apply as no mistakes are allowed. This is why we suggest you look for wall stickers that are repositionable which will make the application process significantly easier.
Next, you will want to consider the application process. Will you need particular tools or the knowledge of a specific application technique? If you have no experience applying wall stickers you will most likely want to favour wall stickers that are easy to apply, allow for mistakes and do not require any tools. Finally, we recommend you check that the wall sticker you are buying can be safely removed from your walls without peeling off paint.
With all this in mind, My Nametags has designed the perfect wall sticker for your home. Our wall stickers are made from a thick material, repositionable, self-adhesive and will not peel off paint when removed. Visit our wall sticker page to get inspired by our themes!
What are the best door stickers for children’s bedroom doors?
Just like wall stickers, door stickers are a quick, easy way to personalising your child's room. In minutes, an old, dull or slightly worn door can take on a new life. You are able to transform the entrance to your child's bedroom with standard door décor such as polka dots or you can go for something more personalised, by customising your door stickers with your child's name.
When purchasing door stickers we recommend you take into consideration the same aspects as when purchasing wall stickers which we describe above. Like wall stickers, you want door stickers that are made from a flexible material to avoid air bubbles and creases, to be able to reposition them if needed and a simple application process. Take a look at what your personalised door stickers would look like here.
Whether you're a first-time sticker user or an experienced pro, we hope these tips should help you get the job done right. Have fun decorating your child's bedroom, and be sure to let us know what design you choose!


